Hello again, bloggers. Thank you for visiting - I truly appreciate it! Today's project is a waving flag card. I've used the Butterflies Thinlits again - can you tell how much I LOVE them?
When closed the card will fit into a DL envelope. You need one piece of A4 card for the main part and a small scrap for the flag, and once you know how it all goes together it's an easy make.
Here's the YouTube video -
Hope you enjoyed the project - see you soon! Crafty Hugs, Keren
Hello bloggers, thank you for visiting! Today I'm sharing this dinky little card -
It measures just 3 3/4 inches square, and when you open it up, there's a surprise pop -up inside -
Here it is in action -
I thought hard about how to get the balloons in just the right place without needing to score the card first (which would show up once the stamping was done) and I hope you'll find my solution useful. You can download the instructions here. My YouTube video shows how I made it...and thereby hangs a tale, because you just wouldn't believe how many takes that video needed - some of it was down to me (like when I put my hand into the Early Espresso ink and then casually brushed against the all-but-finished card) and some of it was due to technical difficulties - like the anti-flicker software on the webcam turning off for no apparent reason. By the time I finished it I was in a right old state, I can tell you! A couple of things I didn't cover in the video - the background stamp on the front of the card is from one of the Sale-A-Bration sets (Best Day Ever) which co-ordinates with the Best Year Ever papers. And after I was down, I thought the inside looked a bit bare, so I added some strips of the Best Day Ever paper. Anyway, thank you for visiting - hope to see you soon! Crafty hugs, Keren
Templates are a great way of kick-starting your mojo when it steps out for a breath of air! Here's the template, from Sunday Stamps' challenge 92 -
and here's my version -
The paper, ribbon and buttons all came from the Sale-A-Bration rewards catalogue - I got them for free by qualifying for rewards, and you can't say fairer than that! I only had to add a bit of Coastal Cabana and Crushed Curry card - matching the colours to the paper - and stamp the sentiment (which is from a SU Hostess reward set) in Coastal Cabana ink and the card was finished.
Today I’m
sharing a waterfall card; these used to be really popular, but have fallen out of fashion a bit.
I used Coastal
Cabana card and a sheet of Designer Series Paper from the Maritime set, as well as small pieces of Whisper White, Real Red and a scrap of Night of Navy on the waterfall elements.
The stamps are
from the Amazing Birthday set - and if you want to get hold of the products I used, there are links at the bottom of this post which will take you to my online shop.
You can
download instructions for a waterfall card here. - and you can watch my YouTube video if you want to see how I made the card.
Don't forget that Sale-A-Bration is still under way until the end of March - for every £45 you spend with Stampin' Up! you can choose an item from the Sale-A-Bration brochure FREE!
Hello everyone, and thank you for visiting! Today I am sharing a tutorial for a springer card. These cards are so easy and such fun to make.
You will need
a piece of card 10" x 5"
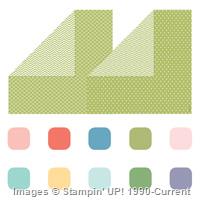
small pieces of paper - one about 3 5/8" square to mat your embellishment, and another one 2 1/4" square - cut from corner to corner (diagonally) to decorate the base of the card.
scraps of card for your sentiment
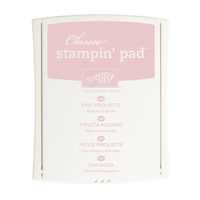
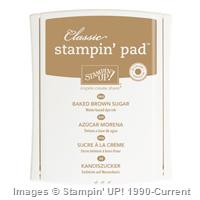
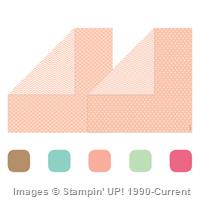
I used So Saffron (131285) and Pool Party from the Subtles Designer Series Paper (130135) for the blue and yellow card and Pink Pirouette (116203) and Baked Brown Sugar from the 2013-15 In Color DSP collection (130136) for the brown and pink version.
I also used my
Stampin' Trimmer (129722)
The "And Many More" stamp set (134276)
Large Oval Punch (119855)
Scallop Oval (119856)
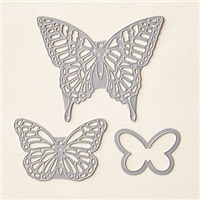
Butterfly Thinlits dies (137360)
With the card in landscape orientation, score at 2 1/2 inches and 5 inches. Mark the card at 7 1/2 inches (both edges) the turn the card to portrait orientation and mark at 2 1/2 inches.
Align the mark you just made with one of the marks on the long side. Cut away the corner (if you're nervous, join with a pencil line first and use a ruler and craft knife). Repeat with the other side.
Score diagonally from the corner you just made to the further score line (the one you made at 2 1/2 inches ), then repeat from the opposite corner. The score lines should cross on the 5 inch score line.
Fold the card - mountain fold the diagonal lines, valley fold on the horizontal lines.
See here to download full instructions.
See the video tutorial here
I love the butterflies - the Butterfly Thinlits dies are in the Spring/Summer Stampin' Up! catalogue, which is published today. And, even better- today is the start of Sale-a-Bration, which means that for every £45 you spend in one order (before P & P) you can choose a FREE product from the Sale-a-Bration brochure.
(If your order comes to £90 you can choose 2 free items, if it's £135 then you get 3 free items and so on..and if your order comes to £150 or more then you qualify for Stampin' rewards. Your Stampin' Up! demonstrator can give you more information, or you can shop with me by clicking the button (top right).
Crafty hugs,
Keren