Hello blog friends and welcome. It's a short blog post and a short tutorial today. I'm a big believer in using my stamps- and crafting stash - for uses other that paper crafts and when I spotted these slate coasters I knew I wanted to use them for home decor. This is how they came out -
Here's how I did it - with tissue paper, Staz-On and clear floor wax.
The clear wax makes a great adhesive/polish. It's acrylic based and is very tough - it's made to be walked on, after all. The first batch I made into wall hangings by gluing a loop of garden twine onto the reverse (I used epoxy putty - hot glue was too easy to pull away) and we sold them at a charity fundraiser. They'd make great small gifts and at £5 for a set of four coasters, they're very inexpensive as well. I hope you like them - and if so, please let me know. I'd also love it if you subscribe to my YouTube channel or like my Facebook page. Thank you for visiting - and please come back soon!
Hello and
welcome to my blog – thank you for stopping by.
I am happy that you’ve taken the time to visit and I hope that you find
something here to interest you.
I love crafting
with paper, but I also love learning how to make new things, and today’s
project is a two-in-one – as well as the sweet little box that holds the tin of
lip balm, I also made the lip balm.
The tins I used fitted very nicely into a 1 ½ diameter hole so I made my boxes accordingly.
The measurements were –
Cardstock 10 inches by 4 inches
Score on the long edge at 1 inch, 3 inches, 4 inches, 6 inches,7 inches, 7 ½ inches, and 9 ½ inches – these last two score lines will help form the holder for the tin
Score on the short edge at 1 inch and 3 inches. Also score at ½ inch and 3 ½ inches part way at the end of the card where the holder will be (the 7 ½ and 9 ½ inch points)
The tutorial explains how to put it all together.
The lip balm is very simple to make; to fill two 15 ml tins you need 1 tablespoon (15 ml) of
coconut oil and 1 tablespoon (15 ml) of beeswax. Melt the beeswax over hot water, and then add
in the coconut until that’s melted as well.
You can also do this in the microwave – try 30 seconds at a time. Once the beeswax is melted, the coconut oil
won’t take long so be careful!
If you want it to taste nice, put in a few
drops of flavouring (the sort you use in cooking; I used lemon in mine) and if
you want it to be tinted, add in a bit of lipstick. I also pierced a Vitamin E capsule and added
that to the mix – it acts as a preservative as well as being good for the skin. Mix it all together and pour into whatever
container you’re using.
PS I’m getting
quite excited because the shiny new Stampin’ Up! Catalogue goes live today. If you shopped with me between January and
June this year (and left your contact details) you should have received your
free copy from me.
Hello bloggers! Thank you for visiting my blog, and a special welcome to those of you who have recently closed to follow my blog or subscribe to my YouTube channel. I am always delighted when someone signs up! Today's project uses the Guy Greetings stamp set and Maritime DSP. I can see the Bristol Channel from my living room window - Swansea is a seaport. I grew up in the South Wales valleys, so living by the seaside is a great blessing for me. My husband is a local boy and his father was a Shipping Agent. He has fond childhood memories of accompanying his father onto ships - so anything nautical gets his vote. And I think he's just the best, so the "World's Greatest Husband" sentiment just had to be done!
As you may know, I have a great love for kinetic cards and this card has a surprise inside.
Remove the belly band and -
Two flaps slide aside to reveal the stamped image.
Here's the tutorial -
Measurements -
Night of Navy card - 10" by 5", score on the long side at 2.5" and 7.5"
Sliders - 3" by 2, score at 0.5" (if you don't have the Banners framelits you will need to cut a triangle out of the sliders - cut in to a point about half an inch from the unsecured side and adjust if you need to.)
Real Red card - 3" by 5"
DSP for front - 4.75" square, cut in half
Rosette - 1.5" by 12", score at .25" intervals
Belly band - 2"by 10"
Thank you for visiting and I do hope you enjoyed the project. See you soon!
Hi everyone, welcome to my blog. Thank you, everyone who's been so kind about the little self-closing box I blogged last week...I'm so glad you liked it! It was a design I came across some time ago, and my main contribution to the design was the fancy top. Today's project is one of those cute little folding box cards.
I like to make these square, so I trim my cardstock. This means I have card left over to make the struts to hold the embellishments.
Measurements - Card cut to 5" x 10 1/2"
Score on the long side at 2 1/2", 5", & 1/2" and 10"
Score on the short side at 2 1/2", stopping at the third score mark.
Would you like a template? You can download one here.
The decorative paper is cut into 2 1/4" squares.
Full instructions - including how I coloured the glitter paper stars - on my YouTube channel.
Hi Bloggers! Welcome to my bit of the Pootlers Blog Hop.
If you're following the blog in order the you've arrived here from Caroline's blog and you know what it's all about. If not, please do go back through the list and take a look at all the fab things the Pootlers have produced.
I just love cards that do something, and today's card is an example of a magic window card. Here is is -
Pull on the tab at the top and -
Magic! We're basing our posts around the latest Stampin' Up! catalogues. and as we're still in the middle of the Sale-a-Bration promotion, my card uses products that you can get for free as part of the promotion. In fact, the only items I used that weren't part of Sale-a-Bration were the white card, the ink pads, the Window sheet and the adhesive. Even the Blendabilities pens I used to colour the bird came from Sale-a Bration - not bad eh! We've got some Blog Candy up for grabs - to be in with a chance of winning a bundle of goodies, including the Best Day Ever stamp set, the Best Year ever paper set and the co-ordinating ribbons and buttons, all you have to do is work your way through the hop before midday on Sunday and leave a comment on every blog. The winner will be chosen at random and announced in the Pootles Craft Forum and here on Tuesday, 3d March. You can see how I made the card in this YouTube tutorial. It's easy when you know how! (Need a diagram? Download one from here!)
Onward, now, to Heidi's blog, and thank you for visiting! Update- due to quality issues, Blendabilities have been discontinued. However, Stampin' Write markers are available instead. If you are using Stampin' Write, stamp your image in Staz-On.
Hello again, bloggers, and than you for visiting my blog. Today I've been playing with the Mini Treat Bag Thinlits dies.
When you pull on the tab at the top of the card, the gift card holder sides out - but not all the way. and when you've finished, it slides back in again, nice and neat.
Hello again, bloggers. Thank you for visiting - I truly appreciate it! Today's project is a waving flag card. I've used the Butterflies Thinlits again - can you tell how much I LOVE them?
When closed the card will fit into a DL envelope. You need one piece of A4 card for the main part and a small scrap for the flag, and once you know how it all goes together it's an easy make.
Here's the YouTube video -
Hope you enjoyed the project - see you soon! Crafty Hugs, Keren
Templates are a great way of kick-starting your mojo when it steps out for a breath of air! Here's the template, from Sunday Stamps' challenge 92 -
and here's my version -
The paper, ribbon and buttons all came from the Sale-A-Bration rewards catalogue - I got them for free by qualifying for rewards, and you can't say fairer than that! I only had to add a bit of Coastal Cabana and Crushed Curry card - matching the colours to the paper - and stamp the sentiment (which is from a SU Hostess reward set) in Coastal Cabana ink and the card was finished.
Today I’m
sharing a waterfall card; these used to be really popular, but have fallen out of fashion a bit.
I used Coastal
Cabana card and a sheet of Designer Series Paper from the Maritime set, as well as small pieces of Whisper White, Real Red and a scrap of Night of Navy on the waterfall elements.
The stamps are
from the Amazing Birthday set - and if you want to get hold of the products I used, there are links at the bottom of this post which will take you to my online shop.
You can
download instructions for a waterfall card here. - and you can watch my YouTube video if you want to see how I made the card.
Don't forget that Sale-A-Bration is still under way until the end of March - for every £45 you spend with Stampin' Up! you can choose an item from the Sale-A-Bration brochure FREE!
Hello everyone, and thank you for visiting! Today I am sharing a tutorial for a springer card. These cards are so easy and such fun to make.
You will need
a piece of card 10" x 5"
small pieces of paper - one about 3 5/8" square to mat your embellishment, and another one 2 1/4" square - cut from corner to corner (diagonally) to decorate the base of the card.
scraps of card for your sentiment
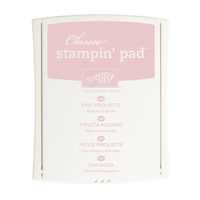
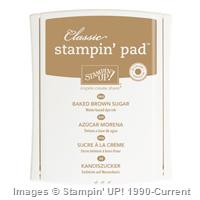
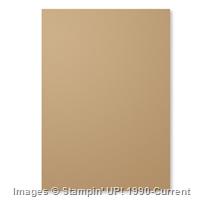
I used So Saffron (131285) and Pool Party from the Subtles Designer Series Paper (130135) for the blue and yellow card and Pink Pirouette (116203) and Baked Brown Sugar from the 2013-15 In Color DSP collection (130136) for the brown and pink version.
I also used my
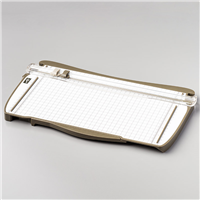
Stampin' Trimmer (129722)
The "And Many More" stamp set (134276)
Large Oval Punch (119855)
Scallop Oval (119856)
Butterfly Thinlits dies (137360)
With the card in landscape orientation, score at 2 1/2 inches and 5 inches. Mark the card at 7 1/2 inches (both edges) the turn the card to portrait orientation and mark at 2 1/2 inches.
Align the mark you just made with one of the marks on the long side. Cut away the corner (if you're nervous, join with a pencil line first and use a ruler and craft knife). Repeat with the other side.
Score diagonally from the corner you just made to the further score line (the one you made at 2 1/2 inches ), then repeat from the opposite corner. The score lines should cross on the 5 inch score line.
Fold the card - mountain fold the diagonal lines, valley fold on the horizontal lines.
See here to download full instructions.
See the video tutorial here
I love the butterflies - the Butterfly Thinlits dies are in the Spring/Summer Stampin' Up! catalogue, which is published today. And, even better- today is the start of Sale-a-Bration, which means that for every £45 you spend in one order (before P & P) you can choose a FREE product from the Sale-a-Bration brochure.
(If your order comes to £90 you can choose 2 free items, if it's £135 then you get 3 free items and so on..and if your order comes to £150 or more then you qualify for Stampin' rewards. Your Stampin' Up! demonstrator can give you more information, or you can shop with me by clicking the button (top right).
Crafty hugs,
Keren