Hi everyone, welcome! Today's project is an origami box. Well, it could be a dish if you didn't bother to make a lid for it. The lid's not compulsory. You can make these pretty much any size you like just by changing the size of the square of paper you start with. If you want to make a few of these that nest, the squares need to be 2 inches larger or smaller (so paper that's 8 inches, 10 inches and 12 inches square will make boxes that nest.) Want to see how it's made? Here you go -
Thank you for joining us for another Simply Sketched Saturday Challenge! We’re so excited to be sharing this hop with you. The products used are all available in the current Annual, or seasonal, Stampin’ Up!® Catalogues*. This time the challenge has been set by Sam Roberts.
This one really was a challenge. The colours are so very far out of my comfort
zone- I’ve hardly ever used Melon Mambo in anger. And while I love Peekaboo Peach and am learning to love Lemon Lime Twist (much to my surprise) I wouldn't have put them together. This is what I came up with-
I thought that the colours would really pop if I put them against black, and I wanted to keep the shapes simple - what do you think?
Anyway, there it is, for better or worse. Now, if you want to see what the rest of the challenge team have been up to, please proceed in an orderly fashion to Vicky and the
Or, if you're the independent type, you might prefer to go to Fiona at the
Whatever the direction of travel, I just know there's lots of inspiration waiting for you! See you again soon, Crafty Hugs, Keren PS - there'll be a tutorial coming out soon - come back and check out my YouTube channel when you've finished hopping! Product List
It's kind of way-back Wednesday today. I'm revisiting a Magic Wallet - something I first made over a year ago. This time I sized it to fit a gift card and used products from the current catalogue. Here's the front (or the back) -
Here's the inside -
And here's the back (or front)
This sort of gift card holder is lots of fun to play with and as long as you follow the steps carefully it's quite straightforward to make.
Hello bloggists, and welcome. Today I've made what appears to be a simple pizza-box style box. I make lots of these, they are so easy to do and useful for holding all sorts of small gifts. I used the speciality paper from the Eastern Palace DSP on the lid - isn't that foiling glorious?
However, the real feature of this box is inside. I've partitioned it off into four compartments to help stop the contents rattling around inside. I've made it to present four tealights , but it could hold other stuff (like handmade chocolates, maybe?)
There was a bit of effort involved in making this one, not to mention some brain strain in trying to work out the best way to create the liner to meet my idea of what I wanted, but I got pretty close in the end. Here's what I did-
I promised to post the measurements and cutting diagram here, so here it is - the liner first -
Here's the measurements for the shell.
I recommend using the broader end of the scoring tool to give yourself a bit of latitiude when folding. The liner is a tiny bit too small - because I didn't want to be working with sixteenths of an inch (they make my head ache) - so you will need to fit the shell around the liner and trim it a bit. It does make the lid fit better, though. I hope you enjoyed this one. Crafty Hugs, Keren
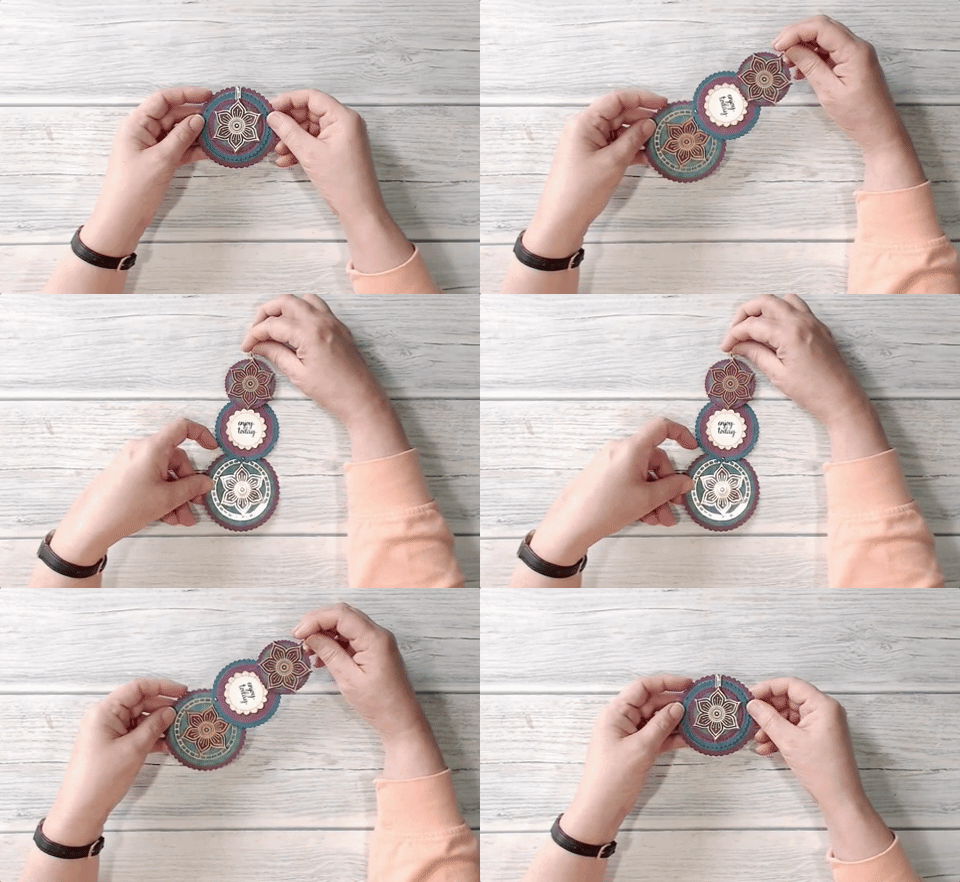
Hello bloggists. Today I've made a telescope card. When it's folded up to go into an envelope, it looks like this - But when you unfold it, it looks like this -
This is how it opens up- lots of fun, don't you think?
When I was making this, I was a bit concerned that the colours were too dark - but I think it came out OK in the end - very rich-looking. I love the vinyl stickers in the Eastern Palace suite. There are fashions in paper craft and a few years ago peel-offs were everywhere (I still have a big box of them somewhere) and very useful for applying a quick greeting. However, they did get a bit overdone and have been out of style for some time now - perhaps they're creeping back in a new, more elegant form!
Here's the tutorial video -
I hope you'll give this a try - let me know how you get on (or pop over to my Facebook page and leave me a picture - that'd be even better!) See you again soon, Crafty hugs, Keren
One more sleep until the new catalogue
launches! If you’ve got your copy, I’ll
bet you’re excited about all the luscious new products and are raring to get
ordering. I know I’ve got a wish list
that’s quite extensive!
Today’s project features items that have
been carried over from the 2016-17 catalogue as well as new things. I was glad to see Jars of Love wasn’t
retiring – I want to play with this set a bit longer.
Hello there, and welcome to my blog. I love sentiment dies, especially a nice big one like this. You don't need much else to make a card and it takes minutes. The die is one of the luscious new things in the 2017-18 catalogue. And just LOOK at the colour of that ribbon...coming soon...or available now as part of the Eastern Palace pre-release...scrumptious! Here's how I made it-
Are you excited about the new catalogue yet? Not long to wait now!
It's another project featuring the Eastern Palace suite today - so happy that Stampin' Up! have made this available ahead of the new catalogue launch, and even better, it's available as a bundle (well, two bundles) at a discount during the month of May. (Want to know more? See it here!) As a demonstrator, I get to buy new products before the new catalogue goes live, but my order hasn't arrived yet - so it's so good to have new stuff to play with ahead of time.
This colour combination reminds me very much of some dresses I had when I was younger. I thought Lemon Lime Twist was going to be too bright for me but it's definitely growing on me. (I didn't think I'd be sad to say goodbye to Mint Macaron - but I am!)
Here's the tutorial. By the way, I've been asked a few times about the table I work on - that wood surface is actually wallpaper, pasted onto a picnic table (I don't have a craft room, it all happens in my living room!). When it gets too stained, I just tear it away and put a fresh piece on. Anyway, back to the tutorial!
What do you think? Do you like the colour? Let me know! See you again soon, Crafty Hugs, Keren
Hello there, and welcome to my blog! Today's project is based on something I saw while I was watching Create & Craft on TV.
It's a variation on a pop-up box card, but doesn't it look amazing?
Isn't Lemon-Lime Twist beautiful fresh colour? And doesn't it look great with Dapper Denim? I'm so happy that Stampin’ Up! has released the Eastern Palace suite ahead of the main catalogue launch at the beginning of June.
Today’s project is a mixture of old and
new. On the one hand, the DSP I’ve used
on this twisted gatefold card is retiring at the end of this month (but it’s so
pretty that I couldn’t resist using it!).
I also couldn’t resist playing with the Botanical Builders dies one more
time, before they leave us (I’ve really enjoyed using them).
The card base is thick Very Vanilla (something
we’ve been asking Stampin’Up! to stock for quite some time now) and the stamps
and dies are from the Eastern Palace suite, which is going to be in the new
catalogue but which has been made available from 1 May. There are two bundles available (at a
discount price until the end of this month, each with a free gift). Here's how I made it -
I know I'm going to have so much fun with this suite! How about you?

 Hi everyone, welcome!